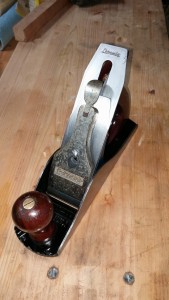
This will probably be the last post about this plane for a while, as its now ready to work. The plating on the lever cap is pitted pretty badly, but I haven’t decided how to remedy that yet. Not sure if just polishing it and ignoring the pitting (it doesn’t affect function one bit) or if I’m willing to take a chance on removing the plating either chemically or mechanically and taking it down to the bare metal underneath like the older types. But that can wait.
The next step I took in the restoration is one of the few that were about function rather than looks. For a smoothing plane to work right it is pretty important that the sole be flat If the area in front of the mouth isn’t coplanar with the area behind it the plane will produce curved surfaces instead of the flat and straight we are looking for with this tool. I don’t take this to a ridiculous level like some do but I do take care to use a reasonably flat tile on a benchtop I’ve checked for flatness with a shop made straight edge, as the tile can still flex if you aren’t careful. I followed the steps in this video by Paul Sellers, but his method is pretty standard in the woodworking community.
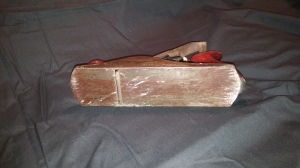
I didn’t take many pictures throughout the flattening process but here is one from before I did anything to the plane:
And here is one after about a half hours work and 5 or 6 pieces of 120 grit:
As you can see there is a spot at the toe that was worn down significantly more than the rest, and there are several lines that run the length of the plane in the middle. This indicates that it was used on narrow edges a fair amount by a previous owner. This shows an important point, that simply using a plane will wear it over time, and that flattening isn’t a one time thing. It’s also why I don’t bother polishing the sole to a higher grit than 220, as the wood will leave scratches behind after some use. After a couple of sheets of 220 the sole will look like this:

As you can see, there are still a few marks in the middle but it is more than flat enough to work perfectly.
Next came sanding the sides of the plane. I clamp the plane with one side up in my bench vise (gently, these cast planes can be cracked) and just use finger pressure. I start with 120 grit to remove the dark coating from the Evap-o-rust, remove those scratches with 220, and finish out with 400. I didn’t want to take it to any higher level of polish, as this plane still has some “character”, otherwise known as scars from the pitting. I was worried if I went past a brushed metal look that the pitting would really stand out, but as it is now it looks like a vintage tool that has seen a lot of use. I like it, not too pretentious for a hardware store tool.
I went through the same sanding process on the chip breaker and the iron, up to 400 grit. I used finger pressure until it was time to start polishing the back of the iron where it will be sharpened. I am a convert to the Paul Sellers method of sharpening (big surprise I know). I won’t get into it as in this case a video is worth a thousand words…
That’s the last Paul Sellers plug for this post, I promise. But it is simple, fast, and doesn’t take long to learn. The diamond plates are expensive up front, but they will last a long time and stay flat.
I also cleaned the adjusting wheel and the toe/knob screws with Brasso. I usually do this step on the couch while watching TV. A couple paper towels, a bunch of q-tips, and one sitcom later they have a nice shine and are ready to go.
All that was left to give all the parts a thorough wipe down with the 3-in-1 oil I use on all my tools to prevent rust and lubricate the sole in use, reassemble, and take the after pictures. So here are the before pictures with the after pictures for comparison:
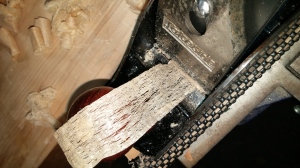
And then came the test drive:
And the only result that matters, a pristine surface better than anything I can get with sandpaper left behind:


I inherited a lakeside draw knife from my grandfather, lucky for me almost no rust! I have been restoring the edge and so far so good! I never knew my grandfather, he died before I was born in 1969. But Im sure he would be happy that I am getting much use from his tool that he obviously took great care in. I like your story and figured I would share.Keep it sharp!
LikeLike